The Corinthian War was a conflict between an
expansionist Sparta and her allies and the combined alliance of Athens,
Corinth, Thebes, and Argos. The war took place between 395 to 387 BC and
involved forces on land and sea. The land warfare mostly took place near
Corinth and Thebes while the ocean battles took place around the Aegean.
Corinth and Athens were the second and largest fleet
in Ancient Greece respectively. They were well established naval
powers. Sparta on the other hand was attempting to build their Naval
power to align with their abilities on land. Most of the Spartan ships
were tribute from allied city-states from the Aegean.
Not all battles of these ancient wars were properly
recorded and many were lost to the mists of time. The action below is one
such battle.

This will be a Trireme fight between the forces of Sparta and the Alliance using Poseidon's Warriors from Osprey. YOu can see previous Corinthian War battle reports here and here.
The Forces
Spartans
1 Slow Trireme unit with Commander, Elite
Marines- 210 pts
4 Slow Trireme units- 150 pts each
Total= 810 points
Alliance
1 Fast Athenian Trireme with Admiral- 200 pts
3 Slow Corinthian Triremes units- 150 pts each
1 Fast Athenian Trireme deploying in reserve- 150
points
Total= 800 Points
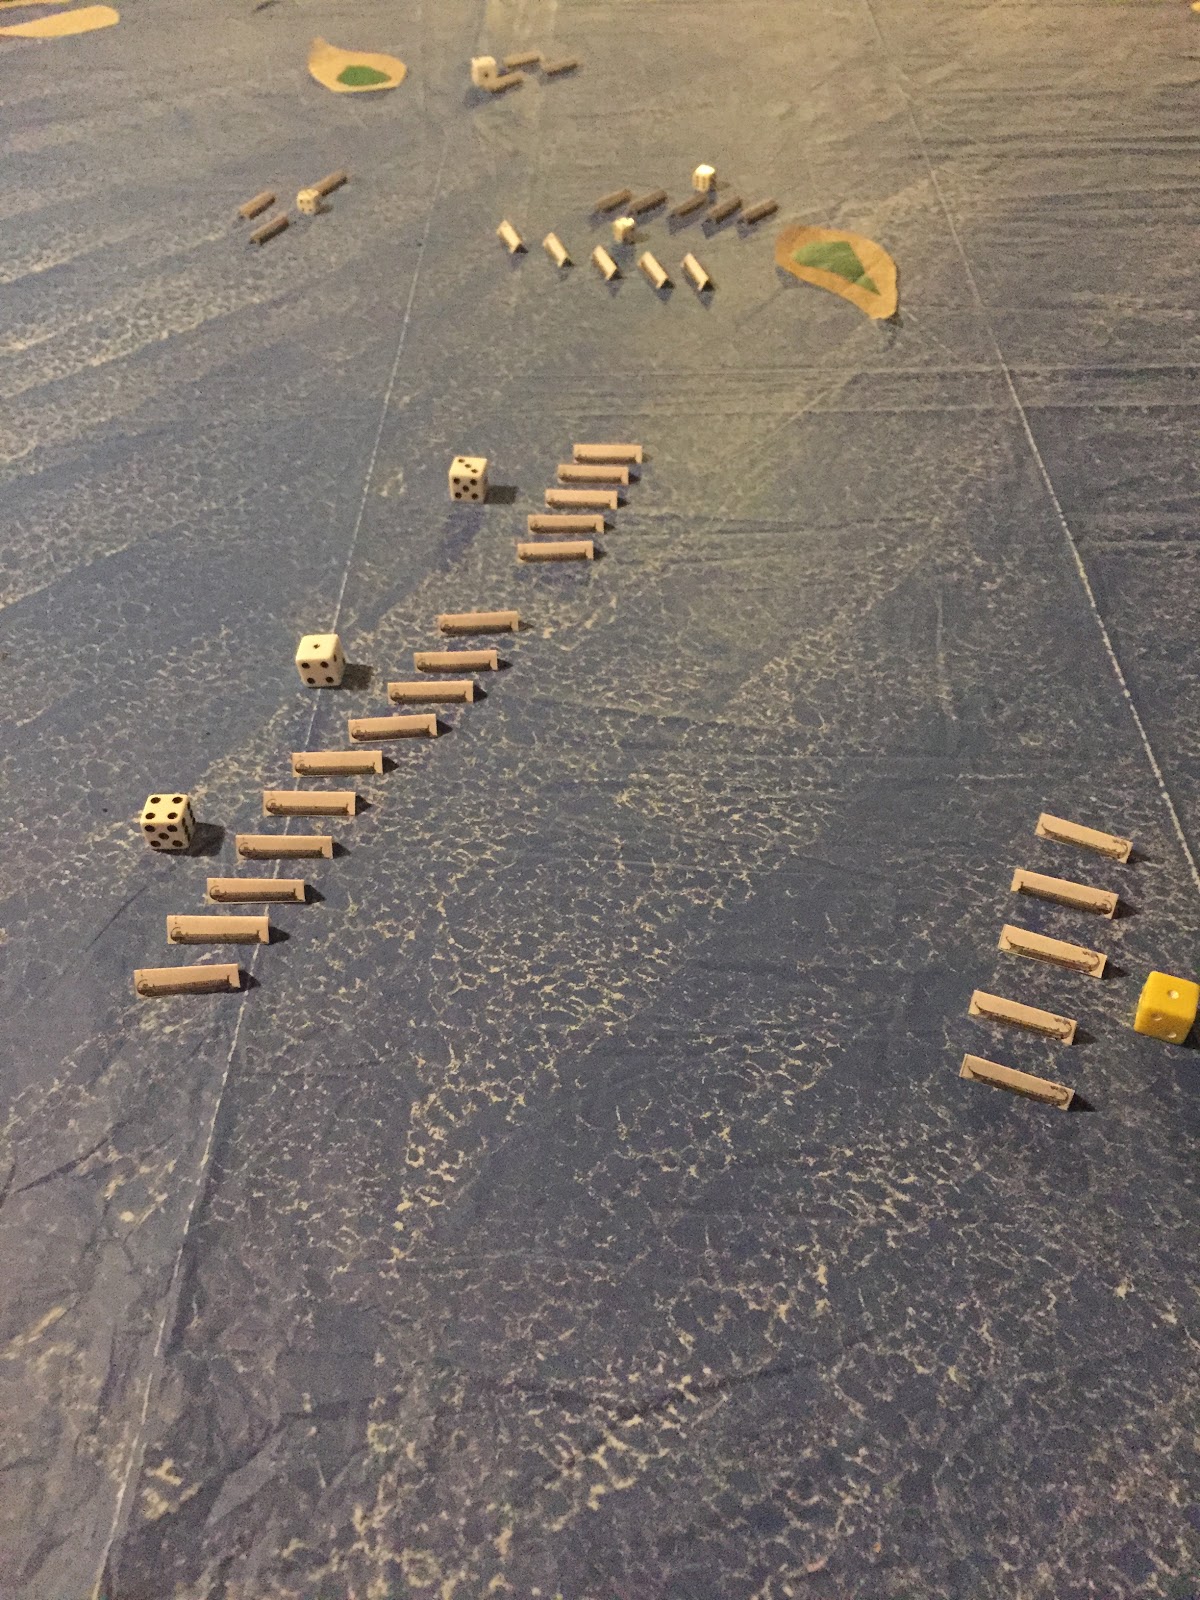
Set-up
On the west coast is a difficult shoreline with access to a
bay. The Spartans are leaving the
bay. They need to get their fleet into
the Aegean and secure their allies. The
Alliance is closing in from both opposite sides of the bay and trying to cut
them off from heading into the Aegean.
If the Alliance can keep the Spartans away from their allied islands,
they might be able to deprive them of growing their own fleet.
Mission
 |
| Add caption |
 |
| Add caption |
 |
| Add caption |
The Spartans are trying to smash their way past the Alliance ships
and move out into the open Aegean. The Alliance is trying to stop their
advance.
 |
| The Spartan Fleet emerges from the bay |
Turn 1:
The Alliance wins and proceeds to move in and try to cut off the
Spartans escape. The Spartans begin to
leave the bay, but turn towards the Athenian Fast triremes.
Turn 2:
Despite the aggressive Spartan turn towards them, the Athenians
press forward. The Corinthians are also
unimpressed and continue to press ahead at full speed.
The Spartan admiral and two other squadrons continue to head for
the Athenians, while the other two squadrons head for the Aegean. However, it seems unlikely they will be able
to get past the closing Corinthians without a fight.

Turn 3:
The Athenians turn in to face the oncoming Spartan fleet. The outer most Corinthian vessels do the
same.
The Spartan fleet realizes it will not be able to escape, and
begins to set-up a battle line.

Turn 4:
The Spartan admiral moves most of his fleet to face off against the
Athenians, hoping to overwhelm the Alliance forces there with numbers. His Second squadron is left with the impossible
task of holding the Corinthians flank alone.
The Athenians begin to play coy, seeing that they need to play for
time so the Corinthians can fall on the exposed Spartan flank before they are
overwhelmed. The Corinthians rush
forward as rapidly as they can, but they must still be wary of the Spartan
Second Squadron.

Turn 5:
The Spartans do not have time to wait, and they surge forward with
most of the fleet. Only Second Squadron
waits patiently for the Corinthians to come around a small island to
attack. They know that this will allow
the Athenians to attack, but they cannot wait.
The Spartans hope that the initial contact will give them gaps to counter-attack
and escape through the Athenian line.
The Athenians do not take the Spartan bait, and instead back away
with the Second Squadron and move to reinforce them with the first. Meanwhile, the first Corinthian Triremes pass
the island into the Spartan kill zone.
The rest of the Alliance ships rush towards the exposed Spartan
flank.

Turn 6:
The Spartans close on the Athenians and open fire with their artillery,
archers, and slingers from the Fifth Squadron.
The fire kills the marines on two galleys. However, they are still too far to
engage.
On the Corinthian side, the Spartan Second Squadron leaps forward
and lands two strikes on Corinthian Triremes.
Somehow, both Triremes survive the ram with box car saving rolls! One of the Corinthian ships is grappled and
boarded with the Spartan Hoplites killing the Corinthian defenders and sinking
the ship. First blood to the Spartans!
The Corinthian Fifth Squadron and the Spartan Second get into a
tangle! Two Galleys from each side
collide head-to-head. Btoh Spartan ships
are sunk, but one of the Corinthian manages to survive! They then exchange missile fire which removes
the marines from 1 of the Spartan ships.
However, the rest of the Corinthian fleet ignores the Spartan
forlorn hope, and heads for the exposed fleet.
The Athenian Second Squadron is forced to commit head-to-head
attacks on the Spartan Fifth squadron. Both
squadrons are essentially destroyed in the ensuing melee.

Turn 7:
The Spartan fleet sees its chance and makes a break for open
water. If they are swift, the Spartan
triremes maybe able to avoid the Corinthians closing in on the flank. Meanwhile, the Spartan Second Squadron
disengages from the Corinthian Fifth and makes for the Aegean.
The Corinthians may have miscalculated the approach and are
hampered by an island. Meanwhile, the
last Athenian squadron backs water to avoid engaging the Spartans.
Turn 8:
The Spartans continue their hell-bent race to the Aegean. They pepper the Athenians with missile fire,
and destroy the archers on two ships and the marines on the other three.
The Athenians finally see their chance, and race forward. It is now or never! A hard turn on the
approach allows them to avoid Head-to-head ramming. 5 Spartan ships are hulled and destroyed in
the attack! The Spartan Admiral’s ship was the only one to be spared from the
First Squadron.

Turn 9:
Spartan ships from Squadron Four and One counter-attack the Athenians
that are up-close and personal. Two from
the Athenian First Squadron are sunk.
Another loses their marines to missile fire. However, Spartan Third and Second Squadron
seem to be breaking out! Can anyone from
the Alliance stop them?
The Athenian Fast Triremes ram the Spartan Admiral’s galley and
sink it. The Admiral is killed in the attack. However, his plan seems to have worked as the
Corinthians do not look like they can catch the Third Squadron before it
escapes.
Turn 10:
With an unexpected surge of speed, the Corinthian Fourth and Third
squadron race ahead and engage the fleeing Spartan Third Squadron. The Alliance won initiative which allowed
them to catch the fleeing Spartans. Two
galleys are rammed and sunk! The rest
are depopulated of marines and archers by missile fire. Ouch!
The Spartans continue to row madly away for the Aegean.

Turn 11:
The Spartan Second and Third Squadron make it to the Aegean for a
total of 6 ships so far. The Fourth must
row around and island while the Corinthians pursue them.
Missile fire from the Corinthian ships kills archers and marines
in the Spartan Fourth Squadron.
Turn 12:
The Corinthians smell blood in the water and surged ahead one more
time (Thanks to winning Initiative again) and catch the last of the Spartan Fourth
Squadron. They manage to send two more
to the bottom of the Sea. However, the
last two ships escape into the Aegean.

Conclusion:
8 Spartan ships out of 25 escaped into the Aegean. It was a tactical victory for the Alliance,
but the Spartans were able to reach their Aegean allies and force them to
supply aid. Therefore, a Strategic win
for the Spartans.
The Alliance lost 9 out of 25 ships. However, the Athenians took the brunt of the
fighting and lost 7 out of 10 fast Triremes.
The Corinthians might be the dominant naval power in the Aegean
now. Hopefully Persian will pay for more
Athenian Triremes and rowers!
The Corinthian War will continue…
No comments:
Post a Comment